Thanks for visiting!

Saturday, June 19, 2010

Preserving The Harvest - Freezing Eggplant Parmesan


One day of harvest this season yielded us 12 Icheban Eggplants. These are Japanese Eggplants that grow longer and skinnier than the large Black Beauty Eggplants. I have some Black Beauty in the garden but they are slower to produce than these Icheban. I have found no difference in the flavor of these two types of eggplant, only a difference in the way I need to slice them in order to cook them properly.

With this many eggplants coming ripe at once, I prefer to prepare what some people call, "make ahead meals" or "freezer meals" for future use. Eggplant Parmesan is one of our favorites. We eat this dish on pizza night and also on the nights we have spaghetti served up with a side salad.

Preparation isn't anymore time consuming than making say, fried squash but by growing them and making them ahead, I am saving the cost of purchasing eggplant from my local grocer.

Following are the instructions for preparing Eggplant Parmesan for the freezer, my way:

These are the dozen or so eggplants I harvested from the garden. I probably should have washed them prior to taking the picture but I just wasn't thinking ahead.


Wash the eggplants then cut off the ends, peel and slice them. If I am processing Icheban Eggplants I cut the in half, then I slice them lengthwise for elongated slices. If I am processing the larger, rounder Black Beauty Eggplants, I slice them the other way for round slices.


I prepare my frying pan with olive oil and set it on medium heat. Once the oil is hot, then I begin cooking the slices. First I roll them in beaten eggs.


Then I roll them in bread crumbs blended with Parmesan cheese. This can be you favorite type of bread crumbs, seasoned or not.


Fry these in hot oil until crispy and brown on both sides. Remove from pan and drain on paper towels.


Once all of the slices have been fried and cooled completely, I begin the layering process. For storing away in the freezer I use the 8" x 8" x 1 1/2" aluminum pans that come with plastic lids which snap on. Here is a picture of the two pieces:


Using my favorite spaghetti sauce as the first layer, I smooth a few tablespoons around in the bottom of the pan. This is mainly to prevent the eggplant from sticking to the pan during the baking process later on.


The next layer is the fried eggplant.


Then I spread another layer of the spaghetti sauce on top of the slices.


Then I top the spaghetti sauce with shredded Mozzarella Cheese.


Then a layer of eggplant slices and continue repeating this process, ending with the cheese on top. In my case, I was able to get 2 layers of eggplant in my container.


Snap the lid on top and place in the freezer.


When I am planning this dish for one of my meals, I remove it from the freezer, thaw completely then bake in a preheated 350 degree oven until hot all the way through.

I hope some of you find this to be helpful this season.

Preserving The Harvest - Freezing Zucchini Squash

I recently posted instructions for freezing yellow summer squash. While the instructions are the same for both vegetables, I am posting them separately because the size to harvest is different.

You will need the following items:

Knife & Cutting Board
1 large empty Bowl
1 large Pot of water
1 Colander
1 large Bowl of very cold water
Large Cookie Sheet lined with Paper Towels
Freezer bags in the size of your choice (I use quarts for squash)
Marker for recording the date on the bag

I harvest Zucchini Squash at between 8 and 10 inches long but no bigger around than my fist.

The first thing I do is wash the zucchini in cold water, removing any dead blossoms which are still clinging to the blossom end and scrubbing lightly to remove any stubborn dirt particles.


I cut the ends off, cutting at least 3/8" of the blossom end off because this is where the enzymes are stored which begin the rotting process of the zucchini. Then I cut the entire zucchini into 1/4" to 1/2" slices, placing them into the empty bowl. I believe this is a personal preference as to how thick or thin you'd like your squash to be. Also, if you plan to fry it you may want it a bit thinner than if you plan to stew it or cook it in a casserole. This is your call.


I bring the water to a boil as I slice the last few zucchini. Once it is boiling I place part of the zucchini slices into the water and blanch (boil) them for 1 minute. This kills any remaining enzymes which may be working to rot the vegetable and kills any other germs which may be hanging around. This is the best way to prepare some vegetables for long term storage in the freezer.


After the 1 minute blanching period I use my colander to remove the zucchini from the boiling water, shake them a bit and drain the excess hot water off for only a few second.


Then I immediately plunge them into the bowl of very cold water (or ice water) to shock the vegetable and stop the cooking process immediately.


Once I am satisfied the vegetable slices have cooled to my desire, I remove them with the colander, draining them again and spread them out on the paper lined cookie sheet to drain further and to cool down completely.


I repeat this process in portions until all of the sliced zucchini squash has been blanched, cooled and drained. You may find it necessary to add ice to the shocking water in order to keep it cool, depending on how many batches you have to blanch.

The final step is to pack the squash for the freezer. I use quart size freezer bags, marking on the front what the bag contains and the year that I prepared it. I don't necessarily pack the bag full, I simply estimate how much my family needs for one meal and pack accordingly. Zucchini Yellow Summer Squash should keep in the freezer for up to one year.


I hope some of you found this to be helpful in one way or another.

Have a blessed day!

Wednesday, June 9, 2010

Preserving The Harvest - Freezing Yellow Summer Squash

Last year, I did a post similar to this with instructions for freezing yellow crook neck or straight neck squash, only without pictures. This year I am posting new instructions on how to freeze summer squash with a few pictures as well.

You will need the following items:

Knife & Cutting Board
1 large empty Bowl
1 large Pot of water
1 Colander
1 large Bowl of very cold water
Large Cookie Sheet lined with Paper Towels
Freezer bags in the size of your choice (I use quarts for squash)
Marker for recording the date on the bag


Below is today's harvest of Yellow Crookneck Squash from our garden in the back. I harvested 9 squash which averaged about 6" long.


I rarely allow yellow squash to grow any larger than 6" because I prefer them young and tender. Zucchini Squash is handled differently, which I will address in another post in a couple of days or so.


The first thing I do is wash the squash in cold water, removing any dead blossoms which are still clinging to the blossom end and scrubbing lightly to remove any stubborn dirt particles.


I cut the ends off, cutting at least 3/8" of the blossom end off because this is where the enzymes are stored which begin the rotting process of the squash. Then I cut the entire squash into 1/4" to 1/2" slices, placing them into the empty bowl. I believe this is a personal preference as to how thick or thin you'd like your squash to be. Also, if you plan to fry it you may want it a bit thinner than if you plan to stew it or cook it in a casserole. This is your call.


I bring the water to a boil as I slice the last few squash. Once it is boiling I place part of the squash slices into the water and blanch (boil) them for 1 minute. This kills any remaining enzymes which may be working to rot the vegetable and kills any other germs which may be hanging around. This is the best way to prepare some vegetables for long term storage in the freezer.


After the 1 minute blanching period I use my colander to remove the squash from the boiling water, shake them a bit and drain the excess hot water off for only a few second.


Then I immediately plunge them into the bowl of very cold water (or ice water) to shock the vegetable and stop the cooking process immediately.


Once I am satisfied the vegetable slices have cooled to my desire, I remove them with the colander, draining them again and spread them out on the paper lined cookie sheet to drain further and to cool down completely.


I repeat this process in portions until all of the sliced squash has been blanched, cooled and drained. You may find it necessary to add ice to the shocking water in order to keep it cool, depending on how many batches you have to blanch.

The final step is to pack the squash for the freezer. I use quart size freezer bags, marking on the front what the bag contains and the year that I prepared it. I don't necessarily pack the bag full, I simply estimate how much my family needs for one meal and pack accordingly. Preparing 15 squash I yielded 5 packages this morning. Yellow Summer Squash should keep in the freezer for up to one year.


By Summer's end I will have frozen up at least 40 quarts of Yellow Summer Squash, Pickled several pints and given away even more to friends and family.

I hope some of you found this to be helpful in one way or another.

Have a blessed day!

Tuesday, June 8, 2010

Update

I've been so busy lately I'm not finding much time for blogging. You've all been so understanding over the past year with everything that I'm sure this short lapse in my writing is nothing major.

We're going to have a new well drilled.

Do you know how good it feels to be able to say that? We have spent over 2 years living with a hand dug well. The well we currently have is one that allows us to get things done at home but only at a bear minimum. We have been forced to schedule laundry loads around other jobs that required water.

Recently we had some major problems with the well. . . the pump reached bottom. It pulled sediment into the holding tank that feeds water into our home. Mike worked on it all, bought new parts even a new holding tank only to have this same thing happen again within less than a week. The new tank now has sediment in it too. We gave up on the old well and came to the decision we must have a new well drilled before Summer's end.

We also decided that if we're drilling a new well we need to go ahead and rebuild the inside of the bathroom, replace things in there and just start anew.

Mike worked so hard to gain the extra money for us to go and purchase the new Tub, Surround, Commode, Wood for the floors, Pipes and Sheetrock. The sink we have in there is a new one we just got so it will go back in.

Today, he took the sink out, took the cabinets off the walls, chipped off all the 1970's glass tiles, ripped down the plaster, old sheet rock that was behind it and got it ready for a major overhaul.

While he did that I busied myself reorganizing my laundry room. I went through my quilts and throw pillows and made a few more bags of items for Goodwill. I organized some of my sewing things and pulled the smaller freezer outside for a good preharvest cleaning.

Speaking of harvest - here are the most recent pictures of the gardens:


The front garden (side view) contains corn, green beans, tomatoes, eggplants and peppers.


The front garden (front view)


Green Beans


Back Garden contains 17 crookneck and zucchini squash, 17 slicing and pickling cucumbers, yukon gold potatoes, more tomatoes, okra, spinach, dill, carrots, onions, and more peppers.


Back Garden


Back Garden


Lovely visitor to the gardens


I'll try to get back here in the next day or so for another update. I hope you're all enjoying the warm weather we've been blessed with lately.
See ya soon!

Thursday, May 20, 2010

Visitors - Country Style

Each day when I wake up I pass across the hallway from my bedroom toward the living room. I always stop at the front door and take a quick peek outside just to check for any changes which may have occurred overnight. Most mornings, things are as they were the night before when I turned off the porch light and went to bed.

Some mornings though I am surprised to see some of these changes. There have been mornings when I'd wake up to find evidence that our nutty neighbor had crept into the yard while we were sleeping. One time she put a ziploc baggie in my mailbox with a handwritten note in it. It described how she had professionals come to her home while we were sleeping and install cameras that she claimed scoped my entire front yard, recording everything my family would do during our leisure time outside. Another morning I woke up to find that she had nailed a sign to a tree in my front yard, "Beware of the Dog". Of course we took this "lady" to court and won a 1 year restraining order with an added requirement that she go to a specific facility for psychotherapy for the next year as well.

Other mornings things on the lighter side are found in my yard such as an old shoe owned by a neighbor down the road where my dog visits his Collie friend.

We find fast food bags the dogs have so kindly removed from the road as passersby carelessly litter the highway.

The first week of April I woke up to find this guy in my yard:


He appeared to be part red tick, part beagle. Although I'm not 100% sure. Over the next week or two I medicated this dog, fed this dog and loved this dog. The nutty neighbor however, saw that something new and joyful had entered our lives and called her friend up the road.

This was the friend who gave her money for her own medication, gave her food and offered to love her as I did this independent (some call them strays) dog. The nutty neighbor threatened to have this dog picked up by animal control and put to sleep. Her friend being a dog lover and owner of multiple little dogs got angry at her, called me and between the two of us, we found a very loving home for this guy. Needless to say, the nutty neighbor lost the one friend she had left who helped her through hard times.


The most recent find was these:


All total 6 have shown up in our yard this year. My Border Collie finds them in the fields and brings them home. Not all have survived the ordeal but the last one was a bit larger and no longer nursing age so we immediately got in the truck and drove 1/2 mile up the road to this beautiful cemetery to release him where hopefully my Border Collie won't find him again.

We really do enjoy all the little animals that visit us whether by their own choice or not. Country life has offered us many visits from independent dogs, cats, baby groundhogs as well as these little bunnies. We always offer them food, water, medication and love and we miss them so much when they choose to continue their journey down the road.

Saturday, May 8, 2010

Family Cook Books


I have always kept my own little handwritten cook book of recipes my family enjoys at dinner time and for dessert. Most of them are recipes which have been tweaked to please them and their taste. The majority of those come from another cook book I have which actually belonged to my grandmother.

After my adventures in canning and preserving I have come to the realization that this is something I love and it will be ongoing. Therefore, I am finding myself collecting up a few recipes in that area. I have also been tweaking these for personal taste as well. I will keep the recipes which have been tried and approved by various family members in our home and in the mountains.

So, now I guess I'll find a pretty little book somewhere and begin recording my canning and preserving recipes, methods and little tidbits I have learned along the way.

I think my daughter will enjoy this when she grows up and starts her own family. I know how young ladies like to bring things from their family into their new home, especially cooking methods so I'll be sure to make a copy of this for her.

My sons will receive one only if they request it. When they marry off I don't want to offend their young wives by shoving my recipe books into their faces. It is difficult enough for young ladies to feel like they are pleasing their new husbands without being made to feel like they have to do everything "just like mom".

Just having these things recorded and accessible to the next generation is what matters, not how many want to pick up the books and repeat the process.

What I would find most pleasing would be if one of my daughter-in-laws did request the book and began tweaking it in a way to blend her family's methods with our family's methods. I think that's what family is all about anyway.

Thursday, May 6, 2010

Mulching Our Vegetable Gardens - Part 2 - With Pictures

I promised I'd try to get pictures of the garden and the work as we did it yesterday. After a whole lot more research and talking with Mike, we decided not to use the peat moss. We took it back for a refund yesterday with the intent of using something else. We're just not sure yet what, if anything we'll use. Gail made some really great suggestions. Two of those I can definitely do - 1. The chicken waste we mucked out of the coop 2. Feed bags - I just got tired yesterday after completing all of this other work and will have a fresher outlook on things along with a renewed energy level today when I go outside to assess the garden again.

So, here is what happened yesterday:

This is what the hills looked like before we starred on the garden:


In the following picture you can really see how thick the grass was getting in areas beneath the straw where I couldn't see until I raked it back a little bit:


Below is a picture of our Natural and Organic Insecticide:


The garden after the straw was raked out and each hill hoed:


There is still some straw visible between the rows in the above picture but Mike will be using the tiller between those to take care of that for me.

A little bit closer:


38 Hills of Squash and Cucumbers later, we see happy plants free of pesky old weeds and grass:

Wednesday, May 5, 2010

Mulching Our Vegetable Gardens

Not all of our vegetables require mulch. But we have found that our squash and cucumber plants suffer in the heat if their hills aren't covered a bit with something to hold in the moisture.

Last year, we had great success in mulching our vegetables with straw. We purchased last year's bales from a community store for $4 a bale. Those bales were small and we could tell they were old. But like I said, the straw did a great job in keeping my tender plants cool and for the most part, weed-free throughout the summer.

So of course this year we decided to use straw again. So we visited another store in Mt. Airy. I won't name the store but it is a nationally known farm supply store. They had straw bales for $4.50. At fifty cents more, we found these bales to be about twice the size of the ones we purchased from the community store. They were fresh and smelled so good. We took them home and mulched the newly planted squash and cucumbers.

About 10 days later, little sprigs of grass started showing up in the hills. I visited the garden, pulled the weeds and walked away. Then a few days later, I went to check these hills again. Using my hands I raked back the straw from the first hill, all the way around. There was nothing but a thick layer of rich green grass growing all over the squash hill. I pulled it all, recovered the hill and walked around the garden inspecting the others for this same invasion. Unfortunately, it is there. It is everywhere the straw has been. . . .lesson learned.

I talked to my husband who took me to the garden center (the place I enjoy most because I worked at one myself for several years) to discuss other mulching options. I asked the lady there what I could use on squash and cucumber hills as a mulch. Her suggestion was pine needles or pine mulch. I told her squash and cucumbers were sweet calcium loving plants and asked if the acidity of pine would harm them. She paused, saying she was unsure and telephoned the manager. He said don't use it the pine would burn the plants. Aside from straw his only other suggestion was to use dead leaves. This won't work for us because we just don't have them after burning all the brush lately.

So we left the garden center and visited Lowe's to look at other options. Lowe's had the usual rocks, pebbles, bark, needles, straw, etc. The only other thing they had was Peat Moss.

We know if we attempt to mix peat into the soil of the already existing hills two things will happen. The soil will then retain more moisture. The plants will have been disturbed and may not recover.

The other possibility with peat moss is to wet it and apply it around the plant on top of the hill. We understand that applying it all over the hill isn't a good idea because once the peat dries it will form a crust that water cannot penetrate, causing the opposite effect to our plants that we are trying to attain.

I water by hand only. I don't use the water hose because water is a precious resource for us with our hand dug well and watering by hand gives me quantity control.

So, here is the plan.

We're going to rake all of the contaminated straw off of our plant hills. Yesterday my son and I mucked out the hens nesting boxes.. We'll take this used straw and line their boxes with it as well as their roosting area so we won't suffer a loss.

Then we'll take the time to remove every weed, grass sprig etc from those hills that we can see.

We'll mulch approximately a dinner plate size area on the top of each hill. Once this peat has formed the crust I mentioned, I'll cut a small portion of it about 1 to 2 inches around the perimeter of the stem. This will be similar to a plug that I can simply remove or lift long enough to water the plants then put the plug back into its original position to hold in the moisture and block out the heat.

I really hope this works because I can't spend the entire growing season trying different methods. I will try to remember to take pictures of this as we go, just in case it does work.

Monday, May 3, 2010

Disappointment in Strawberry Farms : Fungicides & Pesticides

I am in Surry County, NC also 1/2 mile from the border of Stokes County, NC. Today I did some searching on the pickyourown.org website to locate local strawberry farms. In Surry County, I found two farms listed. None were listed in Stokes County. I called the first one listed and asked the dreaded question, "Do you spray chemicals on your strawberries." The reply I received was the usual, "Well, yes we do but everything we use is harmless. If it were dangerous, we'd all be dead by now." So I asked the prices of their berries and once she completed her list of prices I asked, "Could you tell me the name of the chemical you spray on your berries?" She paused, then asked the farmer if he knew. He said, "Yes I know what we use. It's called Captan." She repeated this information and I politely thanked her and hung up.

She fails to realize the problem with chemicals being sprayed on crops is not as immediate as "death". It is a long term problem. One that causes birth defects, infertility in young men, cancer, and more.


Captan is a fungicide that prevents things like powdery mildew on plants. It also makes the berries much redder than organic strawberries. Another thing strawberry farmers often spray on their patches is Nutrasweet. This is used to create sweeter berries.

One really bad mistake people make when picking strawberries is eating them while picking. These berries, even though they are porous and have already absorbed chemicals do retain a residue of the chemicals on the outside. This residue is suppose to be washed off really well before consuming the berry. I shiver to imagine the number of small children consuming these berries while picking them and the possible long term effects on their tiny bodies.

Long term use of chemical fungicides such as Captan and pesticides such as Diazinon not only effect the workers but those who eat the final product. These chemicals also effect the environment greatly. The residue seeps into the earth and settles into the water table. Many different varieties of tree frogs are going extinct while others are developing birth defects such as too many limbs or not enough limbs. Killing off the insects is removing their food source.

My gardens have little frogs as permanent residents. I don't shoo them out of my garden or kill them. I welcome their presence. They are the natural insect control I need for my plants. Then if I find the insects are consuming a plant of mine, I still don't use chemicals. I use flour. Yes, the stuff you make cakes and biscuits with. Why flour? Because it coats the bugs and smothers them. This is the same way Boric Acid works but without the toxicity of chemicals.

Here are some natural alternatives to harmful chemical sprays:


So far I have called both strawberry farms in the Surry County, NC area. One I won't visit due to the usage of Captan on their berries, the other had disconnected telephone numbers but by reading their ads, I am sure they spray chemicals as well.

I am having no luck in finding strawberries that are safe to eat when looking at the long term effects.

I discussed the options with my three teens and my husband today. Sadly, we were forced to make the decision not to preserve any strawberries unless we luck upon a chemical free strawberry farm somewhere in our general vicinity.

Sunday, May 2, 2010

Salad Reconstruction: Lettuce vs Spinach

Because I eat a lot of salads, I decided I should look at the nutritional value of my salad ingredients, one by one.

Of course I began by looking at the foundation of the salad, lettuce.

Well, I stopped there because if there is a problem with the foundation of anything, then it will need to be repaired before remodeling any other parts of the structure . . . right?

Right.

Lettuce contains the following:


Nutrition Facts
Serving Size: 1 cup (30g)
Fat, Cholesterol, Sodium, Carbohydrates, Protein 0%

Vitamin A - 10%
Vitamin C - 2%
Calcium - 0%
Iron - 0%
Vitamin K - 60%
Folic Acid (Folate) - 16%
Phosphorus - 1%
Magnesium - 2%
Zinc - 1%

Est. Percent of Calories from:
Fat 0.0% Carbs 0.0%
Protein 0.0%

There really isn't a whole lot going on with a head of lettuce when it comes to getting a good supply of nutrition in a raw lunch. So I decided it was time to make a change in that area as quickly and as simply as possible.

While looking for alternatives, I thought I'd also look for more flavor. Options for a salad foundation don't go much farther than the various types of lettuce and spinach. It is also important that I replace the lettuce in my salad with something I can grow in my own garden along with my other salad ingredients.

My choice is Spinach:


Nutrition Facts
Serving Size: 1 cup (30g)
Fat, Cholesterol, Carbohydrates 0%

Sodium - 23.7mg - 1%
Potassium - 167mg - 5%
Dietary Fiber - 0.7g - 3%
Sugars - 0.1g
Protein - 0.9g - 2%

Vitamin A - 56%
Vitamin C - 14%
Calcium - 3%
Iron - 5%
Vitamin D - 0%
Vitamin E - 3%
Vitamin K - 181%
Thiamin (B1 - 2%
Riboflavin (B2 - ) - 3%
Niacin (B3) - 1%
Vitamin B6 - 3%
Vitamin B12 - 0%
Magnesium - 6%
Panthothenic Acid - 0%
Zinc - 1%
Copper - 1%
Manganese - 13%

Est. Percent of Calories from:
Fat 12.9% Carbs 62.9%
Protein 51.4%

Spinach contains more Vitamin A & K which is important to my personal diet. This is especially true if I do not cook the spinach. Simply tearing it raw as a foundation to my salads retains the nutrients.

Being rich in Vitamin A, spinach can help protect my body against cancer, blindness, bone disease, heart disease and stroke.

It also lowers cholesterol levels.

The Vitamin A in spinach will also help my skin because it has the ability to heal acne, psoriasis and reduces wrinkles and fades age spots.

Spinach contains high amounts of Vitamin K.

At one time, this was the Vitamin that none of the other Vitamins would take to a party. It didn't seem to have any purpose in the body aside from controlling blood clotting. This made it appear to be very dull company.

Move over popular vitamins!

Recent studies have shown new and exciting things about Vitamin K that are bringing it to the forefront.

Vitamin K is not only found in spinach but also hangs around with vegetables like cauliflower, green cabbage, broccoli and Brussels sprouts. It can also be found in whole grain cereals, egg yolk, kelp and alfalfa.

Vitamin K helps the calcium in your body work to straighten your bones. This means people with Osteoporosis benefit from Vitamin K. It also works to help women absorb and retain calcium by reducing the calcium lost in urine. This is a good thing because over 10 million people have Osteoporosis and 80% of those are women.

The blood clotting benefits of Vitamin K makes it useful in preventing hemorrhage in babies and reducing the flow for women who experience excessive menstrual bleeding.

Personally, I find the most impressive benefits of Vitamin K are its ability to fight Alzheimer disease and prevent cancer.

(I must note here that as with anything else there is such a thing as too much Vitamin K. Too much Vitamin K can lead to liver problems or jaundice. If you plan to increase your Vitamin K intake do so by changing the foods you eat rather than buying a bottle of supplements to take. If you feel like you need to take supplements please talk to your physician first. He/she can check your Vitamin K levels and tell you exactly how much more you need in your diet.)

I now have a bed of spinach growing in the garden. Hopefully these newly germinated seedlings will grow and provide me with a delicious raw base for this year's summer time salads.

Thursday, April 29, 2010

Spare Time

Gail asked, "What do you do in your spare time, friend??"

Well, the things I do and enjoy so much are the things a lot of people consider work. If I find myself getting bored I work in my garden or flower bed. I look for things to can or preserve. I bake as much as I can. Hanging laundry on the line has got to be one of the most refreshing activities for me.

But if you mean hobby type stuff:

I love fishing. Our neighbor has a couple of ponds up the road and gave us permission to fish there. I might find the time to go fishing 2 or 3 times a year which is never enough for me.

I like to sew even though I'm not very good at it yet :)

My favorite of all activities is hiking. There is a lot of untouched land surrounding us. Not all of it belongs to us. But we have permission from all of our kind neighbors to hike, play in their creeks, picnic, hunt, etc. So we do. Once turkey season is over and we know the hunters are out of the woods, we will return to hiking again.

Another thing we do is feed the deer. Mike constructs his own hanging, timed deer feeders. We keep those filled with corn year round so the deer will always know the territory we want them to be in when hunting season comes around.

Every other weekend, I go with my mother to yard sales, flea markets and thrift shops searching for vintage linens to decorate the house with. I like old dishes, especially casserole dishes so I always have my eyes peeled for those and vintage cookbooks as well.

I love my animals. It is not at all abnormal around here to see me walking across the yard with one of my hens in my arms. They are the sweetest little things.

More than anything I love being a wife, mom and homemaker. It just doesn't feel like work or chores at all.

Wednesday, April 28, 2010

What's Growing at Thorn Wood?

I'm going to take this opportunity to update my readers on the things that are newly introduced and still growing around Thorn Wood. Last year, I shared pictures of a flower bed around the front porch that Mike built for me. It totals 300 square feet of planting area. When he completed it last year, he took me shopping for plants and flowers. I chose as many perennials as I could because I didn't want to have to work in this flower bed to the extent that it would take me away from the vegetable garden and my other chores.

This year, almost every perennial I planted sprouted out of the ground again.


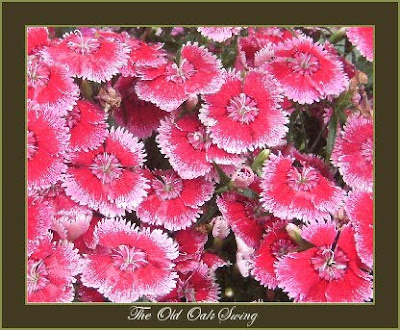
The Dianthus which in our area is normally an annual, came popping up out of the earth with a proud display of blooms.


Thriving better than last year, these little flowers have filled out to become full mounds with dozens of blossoms on each.

The only work I did in the beds this year was planting one flat of Zinnias.


I also transplanted some Tiger Lilies from the back yard.


In the yard our 2 Cherry Trees we planted last year are still going strong. The Plum Tree we planted last year is full of little plums, sure to please our taste buds when harvest time rolls around.

This year we have added to our yard:

2 Winesap Apple Trees
1 Golden Delicious Apple Tree (with a few little apples forming)
2 Peach Trees (full of little immature peaches)
1 Weeping Willow
2 Butterfly Bushes

We turned and tilled an additional garden this year to increase the amount of space for planting vegetables.

We now have one garden in the front side yard where we have planted:

Contender Green Beans (I had great production out of these beans very late in the season last year so I thought I would stick with what works)
Silver Queen Corn
La Roma Tomatoes (for canning and stewing)
Better Boy Tomatoes (for sandwiches, frying sliced, etc.)
Rutgers Tomatoes (for sandwiches, frying sliced, etc.)
Eggplant
Rainbow Bell Peppers

In the back garden we have planted:

Yellow Crook Neck Squash
Zucchini Squash
Short Pickling Cucumbers (for pickling)
Long Slicing Cucumbers (for salads and pickling sliced)
More Rutgers Tomatoes (for sandwiches, frying sliced, etc.)
Sweet Million Tomatoes (for salads)
Spinach
Sweet Georgia Onions
Spring Onions
Chives
Garlic Chives
Dill
Carrots
Yukon Gold Potatoes

I also purchased a few additional herbs to create another herb bed.

They are:
Onion Chives
Lemon Thyme
Mint
Flat Leaf Italian Parsley
Leeks

I am still searching for other herbs I want such as Peppermint, Chamomile, etc.

Now that is the list of things we've planted and I'm sure we shouldn't expect 100% success out of all. We will see what time, weather and hard work produces at the end of the season.

We still have 22 hens:

17 Black Australorp
2 Cinnamon Queens
1 Buff Orpington
1 Speckled Sussex
1 Rhode Island Red

All brown egg layers and excellent layers at that. We sell organic eggs here for $2.00 a dozen. No roosters in the hen house which gives us cleaner eggs.
Site Meter

online counter
Copyright © The Old Oak Swing 2008, 2009, 2010